[Flutter] Flutter APK构建签名并推广到Github workflow
Flutter APK构建签名并推广到Github workflow
最近在开发flutter软件的时候发现构建出来的apk在手机上不能直接覆盖更新,会提示签名不一致,但由于我的软件是在github上自动构建的,所以就琢磨了一下自动签名
步骤如下:
- 使用
keytool生成一个密钥库 - 添加配置文件
- 修改构建配置文件
- 设置Github Secret
生成密钥库
keytool在jdk中,如果cmd里没有的话把jdk丢进环境变量里就行了
接着,在android/app下打开命令行,输入
keytool -genkey -v -keystore key.jks -keyalg RSA -keysize 2048 -validity 10000 -alias key
其中,10000表示有效日期,其他参数我个人认为不需要改
运行后应该是这样的
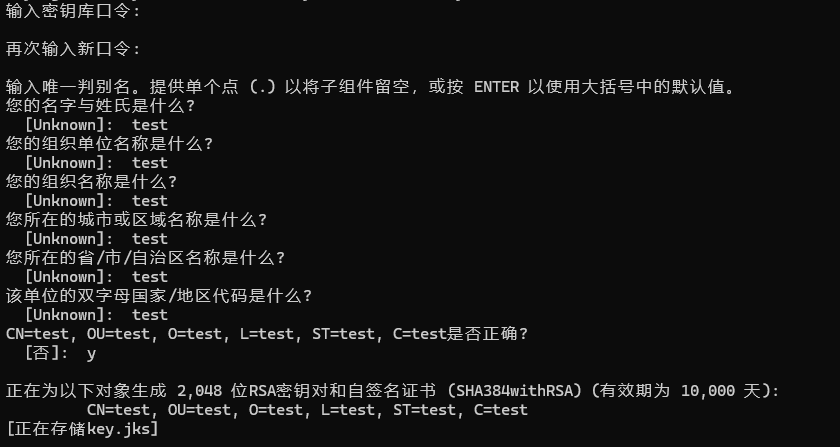
密钥库口令需要保存好,后面需要用
添加配置文件
在android/app下添加新文件:key.properties
storePassword = 123456
keyPassword = 123456
keyAlias = key
storeFile = key.jks
其中的storePassword和keyPassword均填写前面的密钥库口令
修改构建配置文件
只需要添加/修改这些地方,下图已经标好了
(下面有可复制的文本!!)
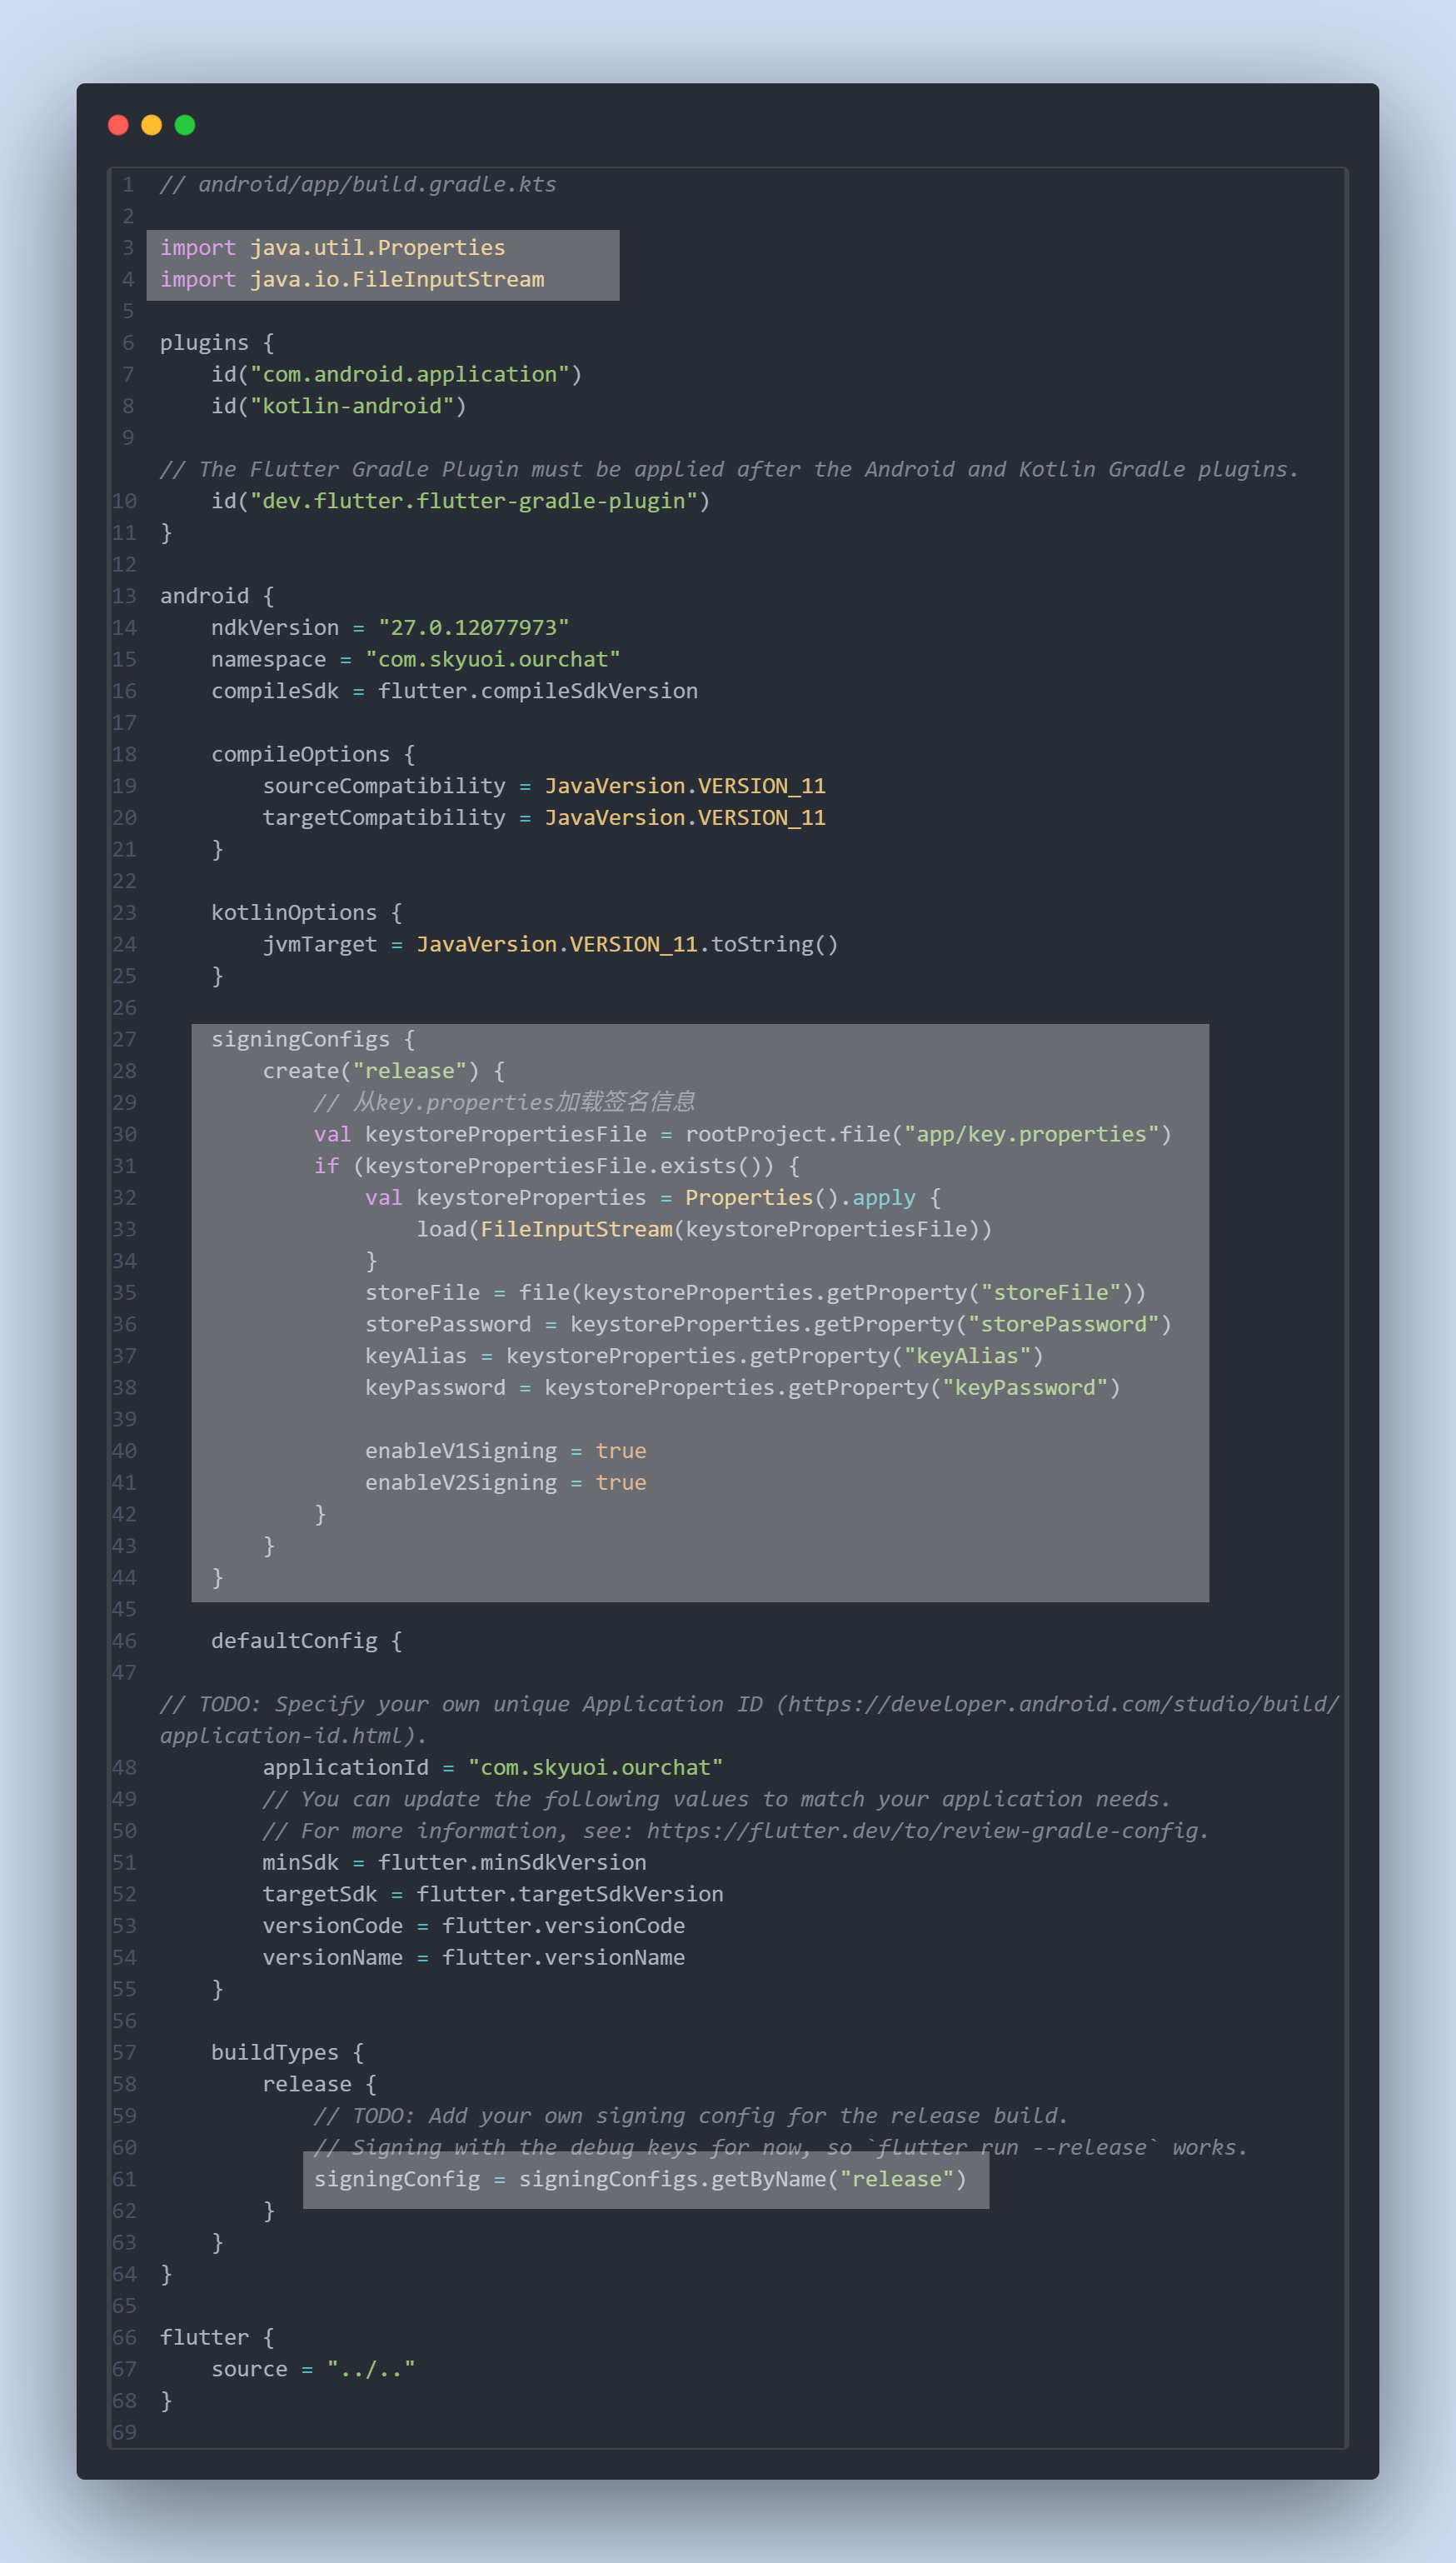
// android/app/build.gradle.ktsimport java.util.Properties
import java.io.FileInputStreamplugins {id("com.android.application")id("kotlin-android")// The Flutter Gradle Plugin must be applied after the Android and Kotlin Gradle plugins.id("dev.flutter.flutter-gradle-plugin")
}android {ndkVersion = "27.0.12077973"namespace = "com.test.abc"compileSdk = flutter.compileSdkVersioncompileOptions {sourceCompatibility = JavaVersion.VERSION_11targetCompatibility = JavaVersion.VERSION_11}kotlinOptions {jvmTarget = JavaVersion.VERSION_11.toString()}signingConfigs {create("release") {// 从key.properties加载签名信息val keystorePropertiesFile = rootProject.file("app/key.properties")if (keystorePropertiesFile.exists()) {val keystoreProperties = Properties().apply {load(FileInputStream(keystorePropertiesFile))}storeFile = file(keystoreProperties.getProperty("storeFile"))storePassword = keystoreProperties.getProperty("storePassword")keyAlias = keystoreProperties.getProperty("keyAlias")keyPassword = keystoreProperties.getProperty("keyPassword")enableV1Signing = trueenableV2Signing = true}}}defaultConfig {// TODO: Specify your own unique Application ID (https://developer.android.com/studio/build/application-id.html).applicationId = "com.test.abc"// You can update the following values to match your application needs.// For more information, see: https://flutter.dev/to/review-gradle-config.minSdk = flutter.minSdkVersiontargetSdk = flutter.targetSdkVersionversionCode = flutter.versionCodeversionName = flutter.versionName}buildTypes {release {// TODO: Add your own signing config for the release build.// Signing with the debug keys for now, so `flutter run --release` works.signingConfig = signingConfigs.getByName("release")}}
}flutter {source = "../.."
}
现在可以先试着跑一下
flutter build apk
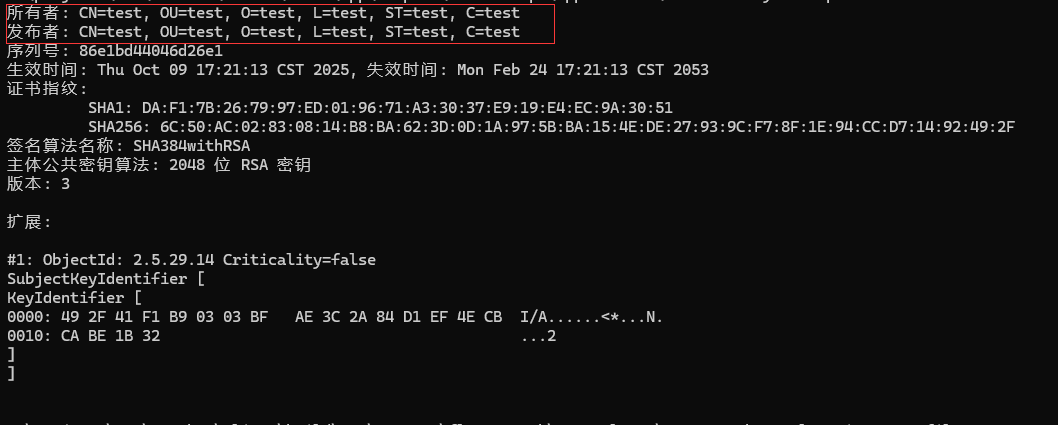
构建成功后,直接解压apk文件,进入META-INF文件夹,在cmd中输入
keytool -printcert -file CERT.RSA
如果显示了先前设置的信息,则签名成功了
推广到workflow
由于密钥库和口令都不能外泄,所以不能直接上传至github(git也是默认忽略掉了这些文件),我们需要通过Github Secret来动态写入密钥库与口令
在Github仓库-Settings-Secrets and variables-actions中新建secret
secret建议KEY_PROPERTIES因为这样后面就可以直接抄作业了(
secret内容直接复制我们刚刚的key.properties文件`
接下来是密钥库文件,由于不能直接丢二进制上去,我们需要先转成base64
powershell:
[Convert]::ToBase64String([IO.File]::ReadAllBytes("key.jks")) | Out-File -FilePath "key_base64.txt" -Encoding utf8
将key_base64.txt加入到secret中,名字写KEY_STORE
接下来进入workflow文件中,在build命令之前加上:
- name: Generate keyrun: echo "${{ secrets.KEY_STORE }}" | base64 --decode > android/app/key.jks && echo "${{ secrets.KEY_PROPERTIES }}" > android/app/key.properties
温馨提示:路径不要写错了,根据自己仓库的实际结构写
大功告成!可以跑一遍workflow再用上文提到的方法检验一遍
额外:根据参数选择是否签名
import java.util.Properties
import java.io.FileInputStreamplugins {id("com.android.application")id("kotlin-android")id("dev.flutter.flutter-gradle-plugin")
}android {ndkVersion = "27.0.12077973"namespace = "com.test.abc"compileSdk = flutter.compileSdkVersioncompileOptions {sourceCompatibility = JavaVersion.VERSION_11targetCompatibility = JavaVersion.VERSION_11}kotlinOptions {jvmTarget = JavaVersion.VERSION_11.toString()}// 配置release签名信息(仅在指定参数时使用)signingConfigs {create("release") {// 从key.properties加载签名信息val keystorePropertiesFile = rootProject.file("app/key.properties")if (keystorePropertiesFile.exists()) {val keystoreProperties = Properties().apply {load(FileInputStream(keystorePropertiesFile))}storeFile = file(keystoreProperties.getProperty("storeFile"))storePassword = keystoreProperties.getProperty("storePassword")keyAlias = keystoreProperties.getProperty("keyAlias")keyPassword = keystoreProperties.getProperty("keyPassword")enableV1Signing = trueenableV2Signing = true}}}defaultConfig {applicationId = "com.test.abc"minSdk = flutter.minSdkVersiontargetSdk = flutter.targetSdkVersionversionCode = flutter.versionCodeversionName = flutter.versionName}buildTypes {release {// 判断是否有签名参数,决定使用哪种签名// 命令行传递 -PuseReleaseSigning=true 时使用release签名val useReleaseSigning = project.hasProperty("useReleaseSigning") && project.property("useReleaseSigning") == "true"// 默认使用debug签名,指定参数时使用release签名signingConfig = if (useReleaseSigning) {signingConfigs.getByName("release")} else {signingConfigs.getByName("debug") // 使用默认的debug签名}proguardFiles(getDefaultProguardFile("proguard-android-optimize.txt"),"proguard-rules.pro")}}
}flutter {source = "../.."
}
这时,如果直接执行
flutter build apk
则不会签名,需要加上参数
flutter build apk -PuseReleaseSigning=true